본문 바로가기

FrontEnd

(65)
Redux 정의 및 인스톨 Without Redux With Redux npm install redux react-redux --save Think of Redux as an object outside of all your components where you put the data and the functions that change that data. And when we want data we just connect the components to Redux. 리덕스를 쓰면, 상태 관리를 컴포넌트 바깥에서 한다! 1. 리덕스를 구독한다. 2. 액션을 취해 리덕스에 업데이트를 요청한다. 3. action을 받은 리덕스는 리듀서에 있는 function대로 일을 처리한다. 4. 그것을 구독한 G에게 전달!
[ReactNative]Timer앱 컴포넌트! import React from 'react';import { StyleSheet, Text, View } from 'react-native';import Timer from './components/Timer' export default class App extends React.Component { render() { return }} App.js 특이사항 없음 import React, { Component } from 'react';import { View, Text, StyleSheet, StatusBar } from "react-native"import Button from "../Button" class Timer extends Component{ render(){ return( 25:00 a..
[ReactNative]Timer앱 요구사항 설치 Visual Studio CodeXCode -- IOS전용Android Studio -- Android전용Expo Client (ios | Android)NodejsYarnExpoNpm 위의 것들이 필요하다! React-Native의 필수 짝꿍인 Expo에 대한 설명을 보면 Expo 기본적으로 우리는 Expo를 이용합니다.뭐랄까, 엑스포는 리액트 네이티브를 기반으로 만들어진 플랫폼인데 우리가 리액트 네이티브로 어플리케이션을 개발하면서 테스팅 해볼때 iOS와 Android 시뮬레이터 모두를 지원해줍니다.또한 실제로 핸드폰에서 단순히 QR코드를 인식시켜주면 우리가 개발하고 있는 어플리케이션을 테스트 해볼 수 있고, 로컬에서 코드를 수정하면 그것이 실시간으로 업데이트 되면서 반영됩니다. 출처: https://..
[FrontEnd] 백엔드 서버와 연결하기! 장고는 localhost:8000 리액트는 localhost:3000 둘을 연결 시키기 위한 방법이다. 아홉 까지 절차를 거치는데 1) Proxy the requests from :3000 to :80002) Install django-cors-headers3) Add 'corsheaders' to INSTALLED_APPS4) Add 'corsheaders.middleware.CorsMiddleware' before 'CommonMiddleware'5)Add CORS_ORIGIN_ALLOW_ALL = True on base settings6)Make Django load the bundles as static files with 'str(ROOT_DIR.path('frontend', 'build', '..
[FrontEnd] Eject ,SASS, CSS Modules 
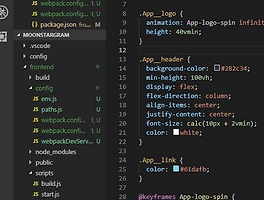
Eject이 도구의 개발자는 그렇게 사용자들을 ‘그 환경에 가둬놓으면’ 안되는걸 알기 때문에 이를 대비하여 eject라는 기능을 만들어줬습니다.이 기능의 역할은 현재 프로젝트의 모든 설정 / 스크립트를 여러분의 프로젝트로 옮겨줍니다. eject를 하고나서는, 여러분 마음대로 커스터마이징이 가능합니다. 솔직히 머하는 건지 아직 잘 모르겠다. { "name": "frontend", "version": "0.1.0", "private": true, "dependencies": { "@babel/core": "7.1.0", "@svgr/webpack": "2.4.1", "babel-core": "7.0.0-bridge.0", "babel-eslint": "9.0.0", "babel-jest": "23.6.0",..
[FrontEnd]React! install!!!!!!!!(InstagramClone) 우아아아아아아아아얼마만에 리액트인지 ㅋㅋㅋ 오랜만에 설레는 마음으로! 일단 인스톨은 다음과 같고yarn global add create-react-app 다음과 같이 실행함create-react-app [앱 이름!] 그리고 해당 앱 디렉토리에서 yarn start 예ㅔㅔㅔㅔㅔㅔㅔㅔㅔㅔㅔㅔㅔㅔㅔㅔㅔㅔㅔㅔㅔ src에서 serviceworker나test.js같이 필요없는것은 지워주고! 시작해보자! ※니콜라스쌤이 리액트에는 바벨이 들어가 있다고 함
[React] movie_app//8. await class App extends Component { state = { } componentDidMount(){ this._getMovies() } _renderMovie = () => { const movies = this.state.movies.map(movie =>{ return }) return movies } _getMovies = async () => { const movies = await this._callApi() //결국 return값으로 json.data.movies를 받음 this.setState({ movies : movies }) } _callApi = () =>{ return fetch('https://yts.am/api/v2/list_movies.json?sort_by=rat..
[React] movie_app//7. AJAX componentDidMount(){ setTimeout(() => { this.setState({ movies : [ { title : '무비1', poster : 'https://az720974.vo.msecnd.net/blog/sass.png' }, { title : '무비2', poster : 'https://cdn-images-1.medium.com/max/1200/0*UR0r5pSLQbvP_yUo.png' }, { title : '무비3', poster : 'https://www.atulhost.com/wp-content/uploads/2016/02/ruby-on-rails.jpg' }, { title : '무비4', poster : 'http://mblogthumb4.phinf.naver.n..